Battle Damage Guide:
Iron Man Unleashed ver 2
This guide is a step-by-step walkthrough of the battle damage effects used to create Iron Man Unleashed version 2. This is not meant to be an all-encompassing guide on battle damage, just the techniques I chose for this project. Take these methods and modify or adapt them to fit your own projects. Experiment! And if you have any questions or comments feel free to contact me:
More photos of the completed figure can be found here: Iron Man Unleashed Ver 2
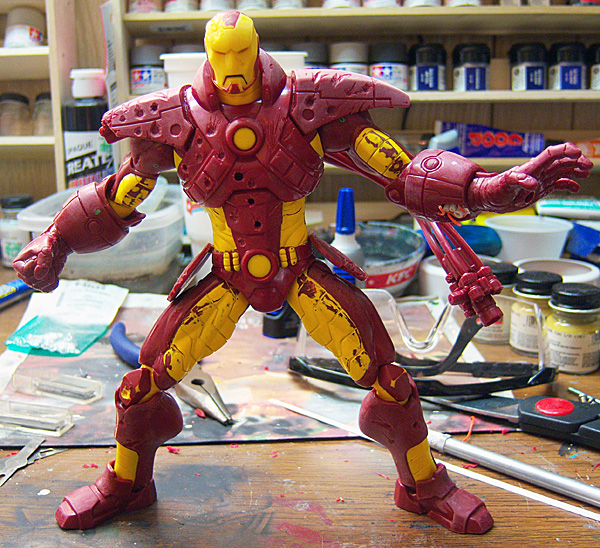
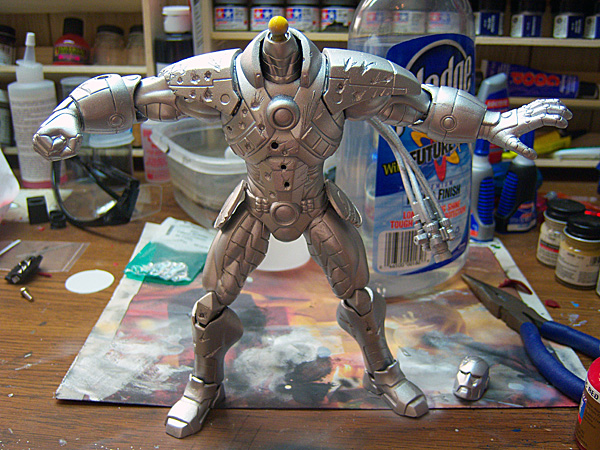
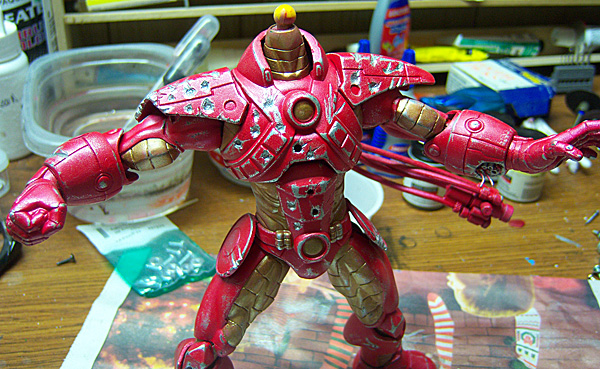
Here is the original Iron Man Unleashed toy I started with:
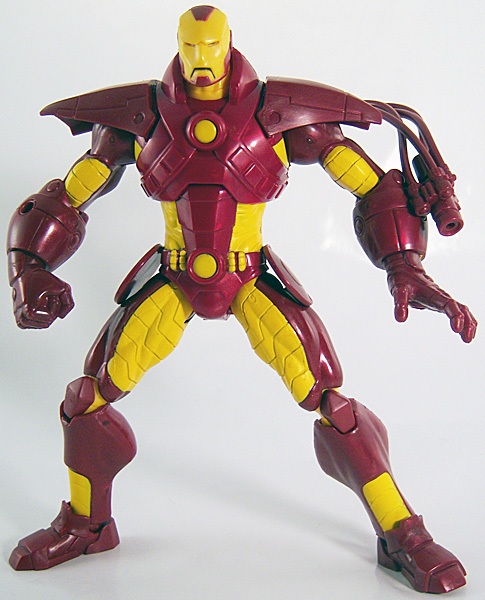
He was wet sanded in mildly warm water with 400 and 320 grit sandpaper to prepare the surface for paint, and then washed thoroughly in dish soap and water. Once dry, I study the figure to determine the best kind of damage to give him. It is important to assess what damage effects you want first and be as prepared as possible before starting. The first thing I noticed is that his right shoulder guard is warped from the packaging:

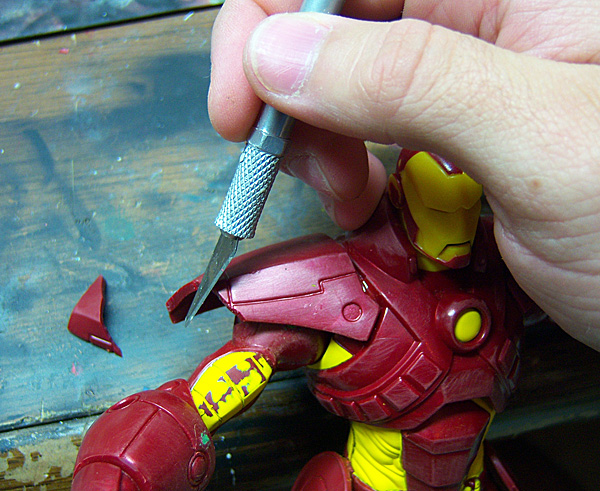
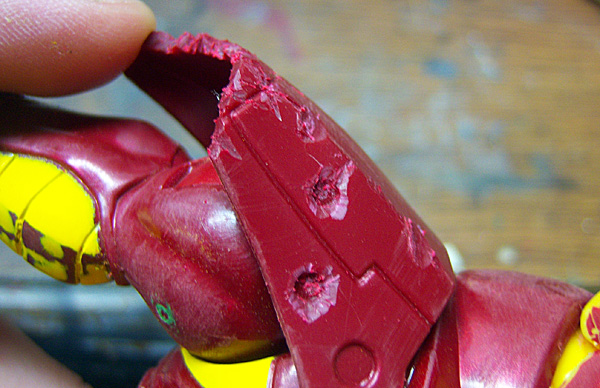
So I decided that part would be removed and the area made to look like it had been blasted off and all that is left is just shredded metal. Using my exacto knife I perform the surgery:
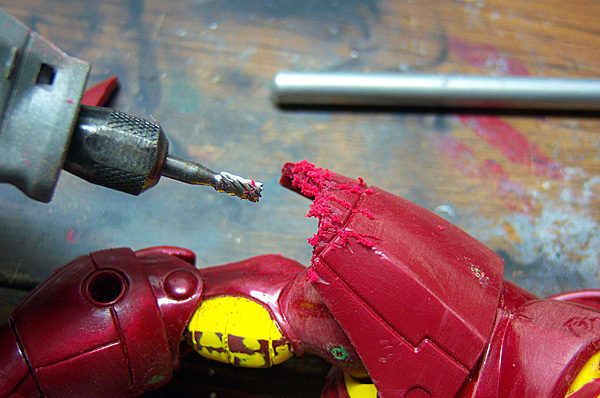
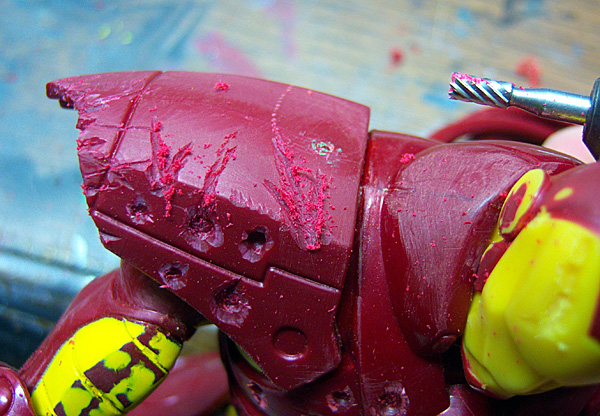
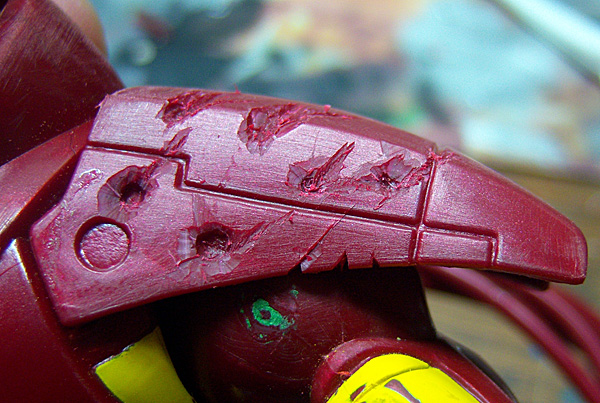
Next I need to create uneven tear marks where the metal would have finally given way. I take my dremel and my favorite cutting bit for battle damage and go to work, moving along the edge and changing direction to make sharp angles:
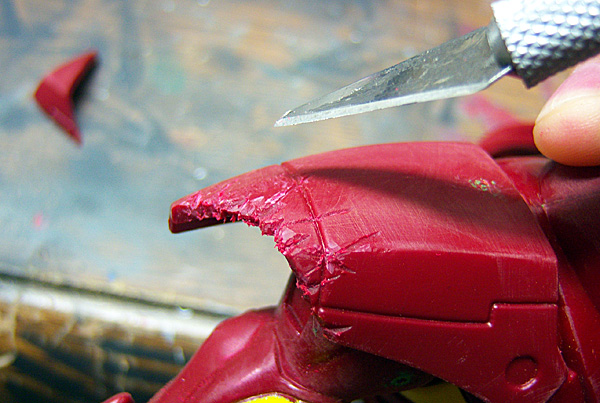
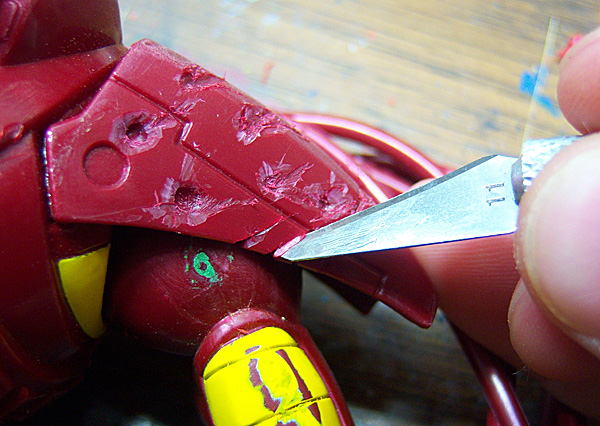
Going back with my exacto I remove the flash that built up and further cut at the edge, deepening the recessed areas and making the sharp angles more pronounced:
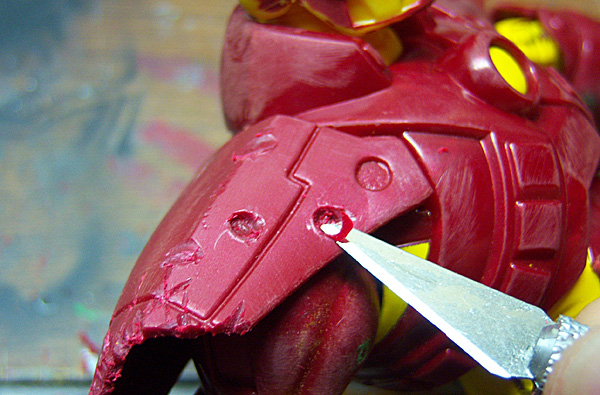
Next up I will add some bullet hits using a drill bit on the dremel. The angle of attack here is important to decide and try to keep relatively consistant. I imagine here that Tony was in the air when he was shot at so the bullet marks would be coming from a low angle:
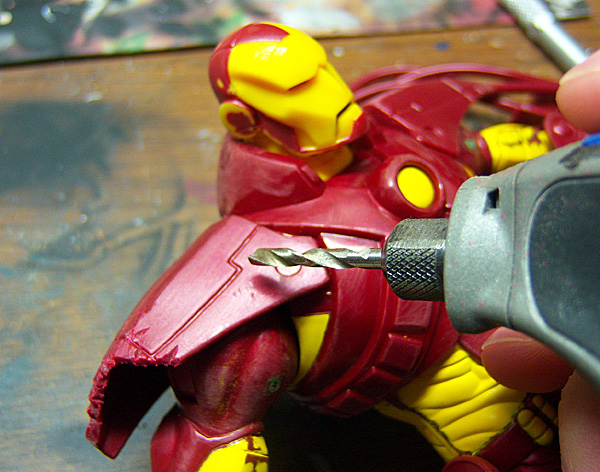
Drilling slowly and carefully I make some bullet holes. Keeping them shallow makes more sense, as a bullet going through the armor means Tony got hit and not just his armor. Here, I want to simulate an explosive shell that detonated on the surface, creating a nice dent but not penetrating:
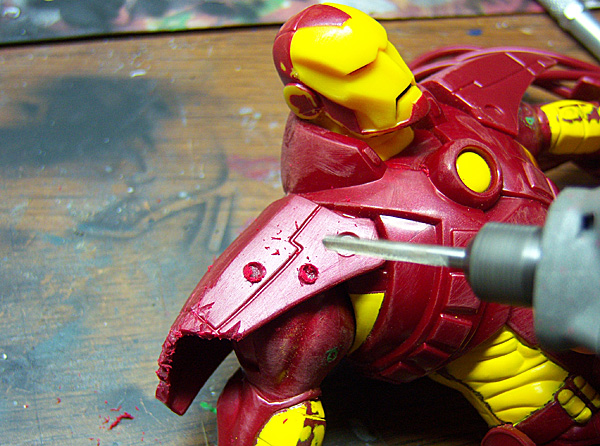
I also add a few to the rim of the shoulder by laying the bit on the edge and starting the dremel, then drawing it back and forth until it makes a half-circle:
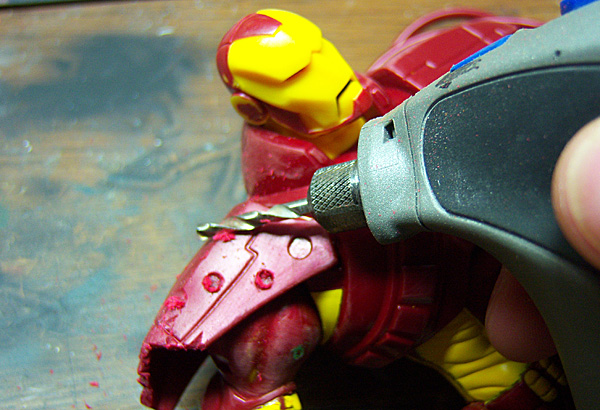
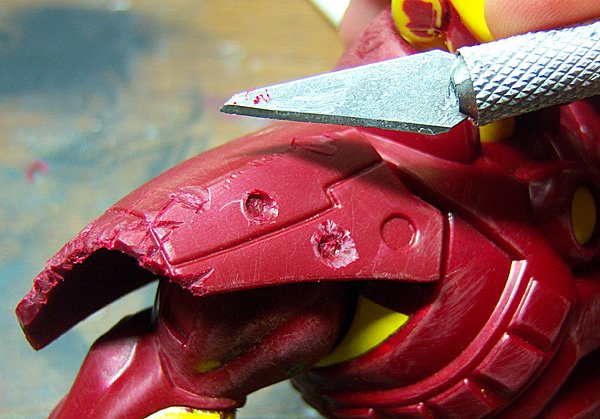
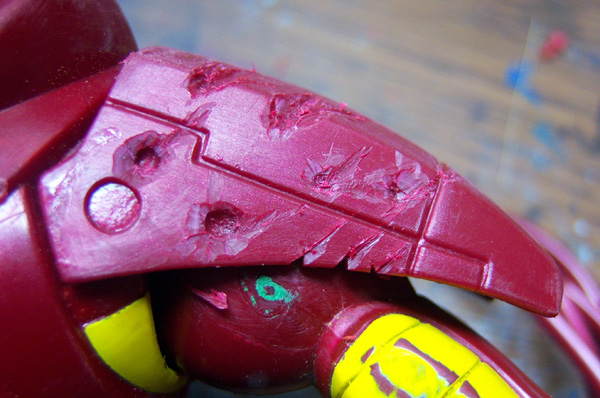
Cleaning off the flash you can see the craters better:
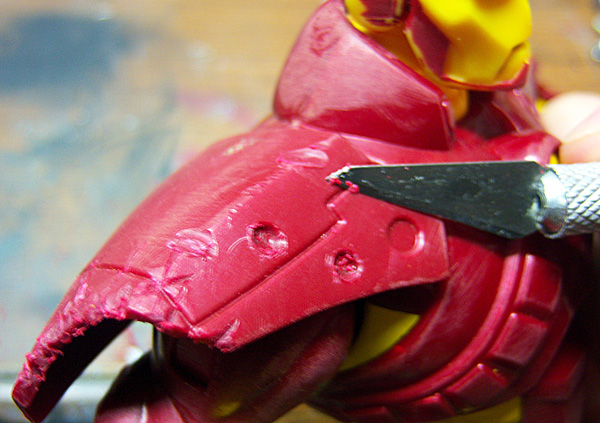
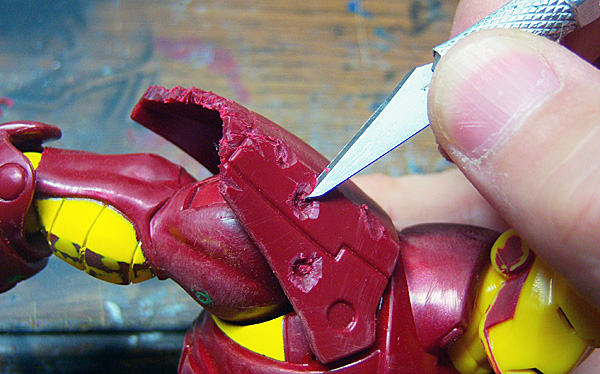
Next step is to add a bevel to the inside of each bullet hit. Taking my exacto I carefully cut at about a 45 degree angle along the inside and try to vary the angle slightly as I go:
Here you can see the result and how it is not a perfect cut but a bit skewed:
I do this to the other bullet hit on the shoulder as well:

Now I'm going to cut a large slice out on the side opposite of the direction I want it to appear the shot came from. This slice is a V shape cutting in from one direction...:
...And then again at the other:
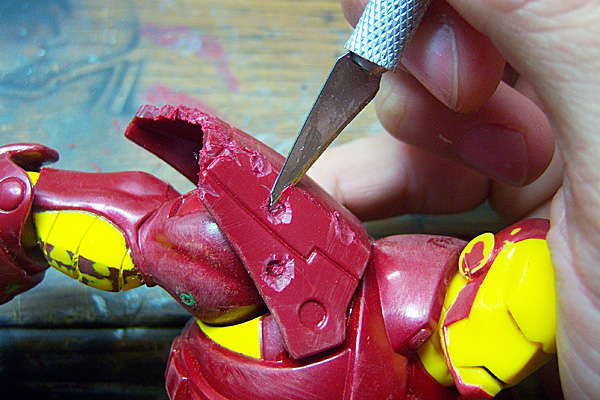
As you can see it helps give the bullet hit more direction, indicating visually that the shot came from below:
Now I drill the rest of the marks I want at this size, then trade down to a smaller size and drill some more hits to add variety. Each one was then beveled out like the first two:
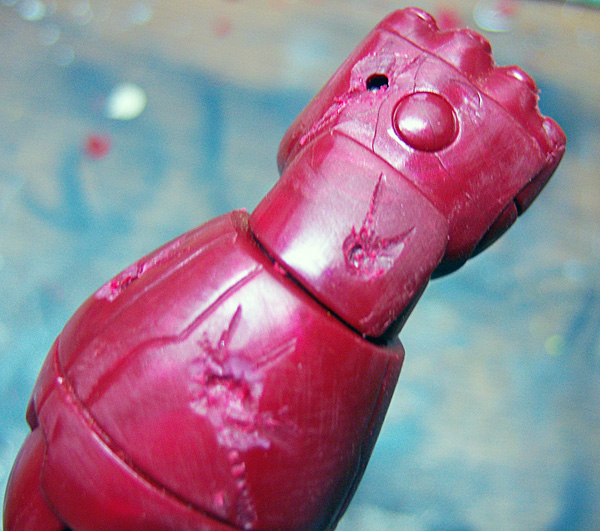
Looking at the pose Tony's right hand is in, it seemed perfect that he would have raised this arm to help shield himself like in the Iron Man movie:
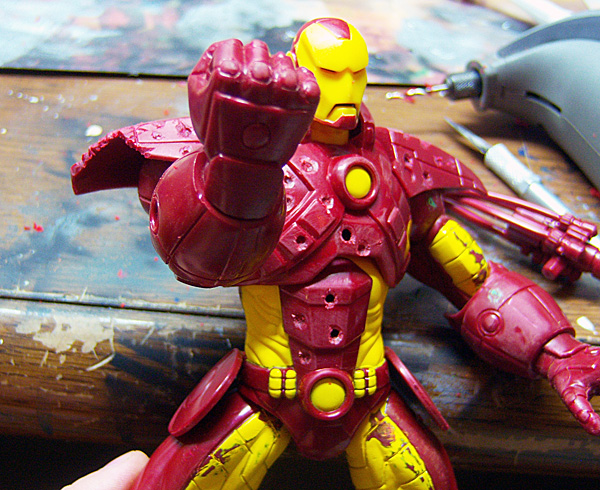
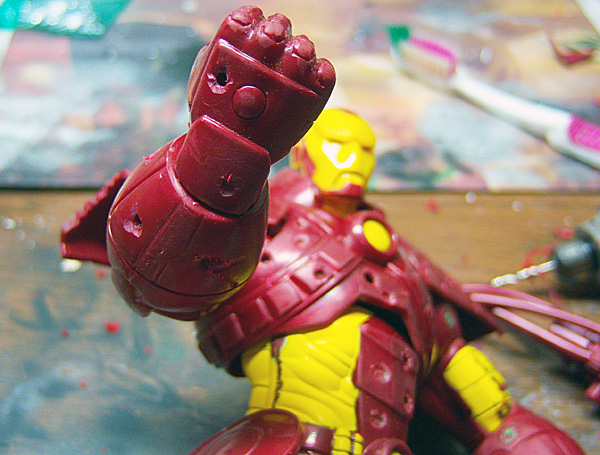
So I add some defensive hits consistent with the angles of the others on the body:
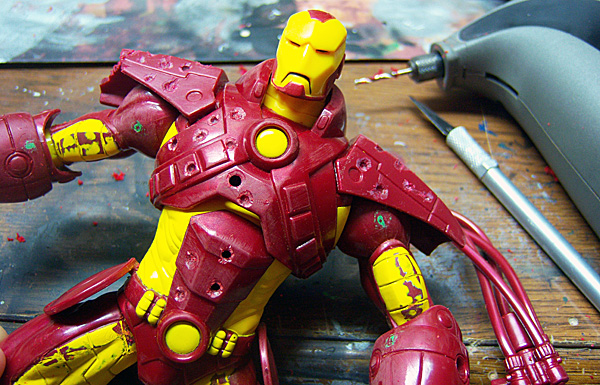
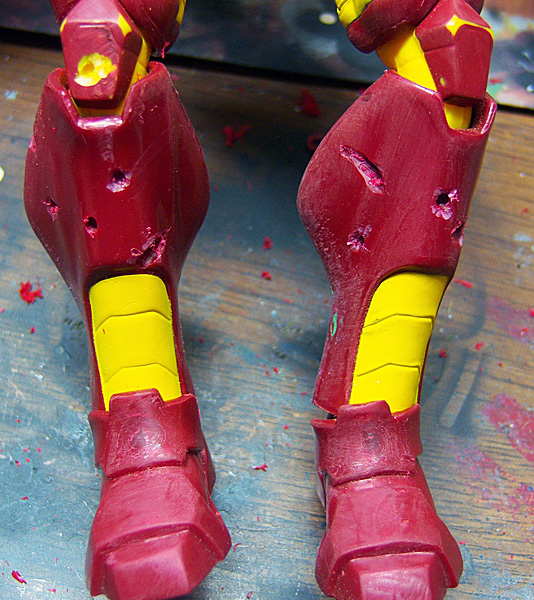
And it looks good if he takes a few shots to the legs as if he got strafed. I tend to keep the hits on major armor panels and not sensitive areas or places that seem less shielded. This makes the damage a bit more like what you would see in the comics:
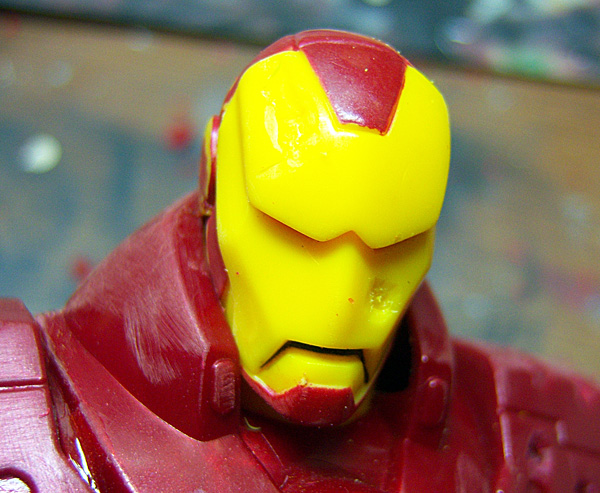
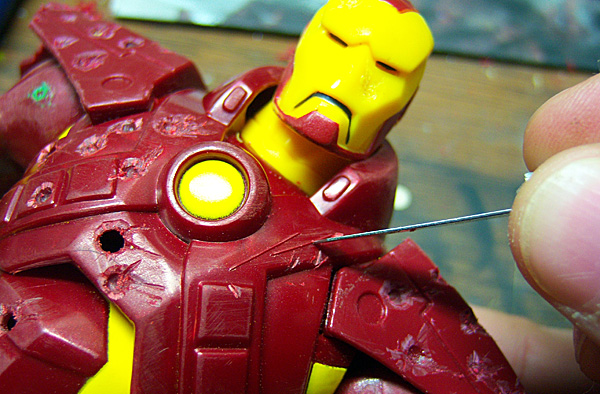
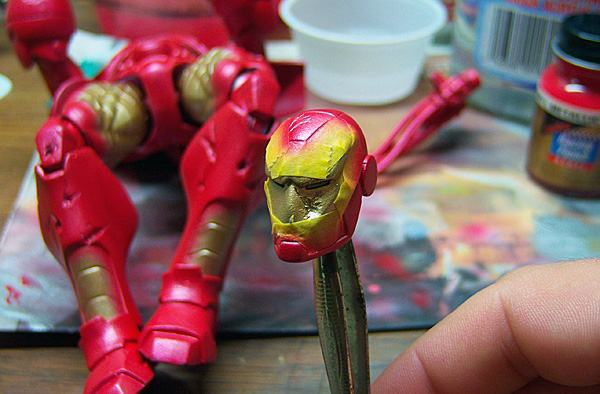
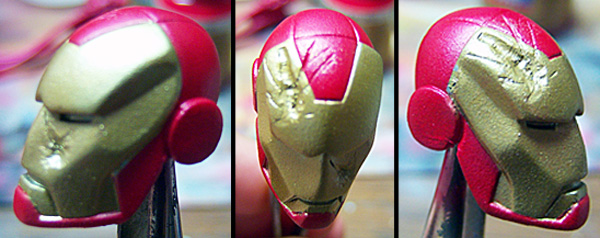
Also important is one or two good shots to the head. This is probably the easiest area to overdo and the placement of the hits needs to be just right. You can see I put a good straight hit on the left cheek, but harder to see in the photo is a larger glancing hit above his right eye:
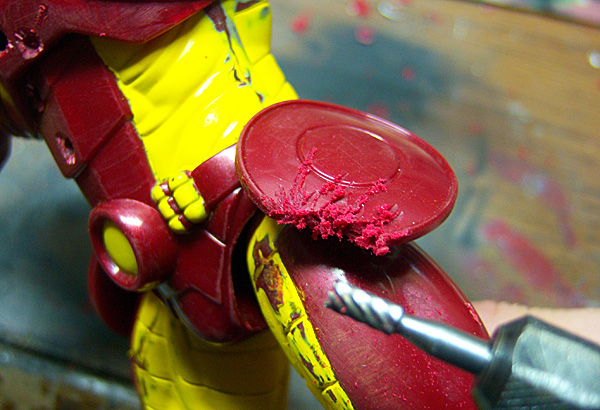
I also added some shredding to his left hip guard using my dremel:
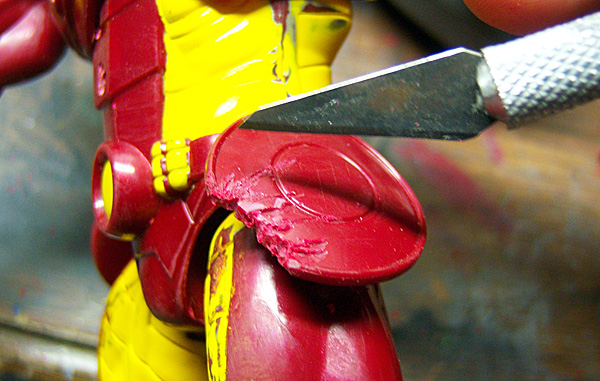
Cleaning off the flash and adding some sharp angles with the exacto gives a better look at the damage:
Now I go back to the bullet hits and add some narrow grooves streaking out from each one using the same dremel cutting bit as before but holding it at an angle as to use just the very edge to make V shape cuts:
Cleaning off the flash reveals how I can "pull" the bullet tear over the edge of his shoulder armor, extending the damage done by the glancing hits further:
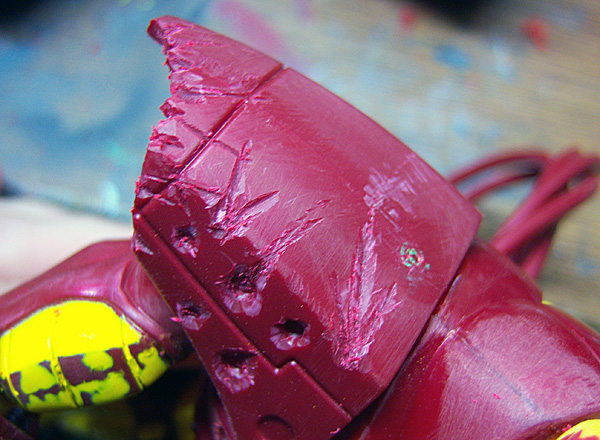
Some of the more direct hits also get this treatment to give them some blast pattern and suggest a direction the bullet came from:
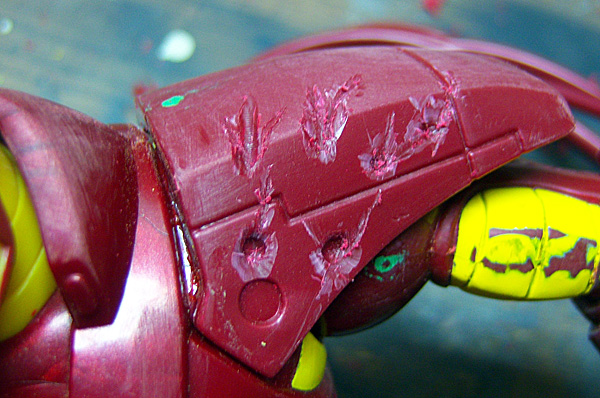
Same thing goes for most of the hits on the shins and legs:

It is important to go back and remove the flash with your exacto before adding more damage. It's too easy to overdo battle damage, and generally, less is more:
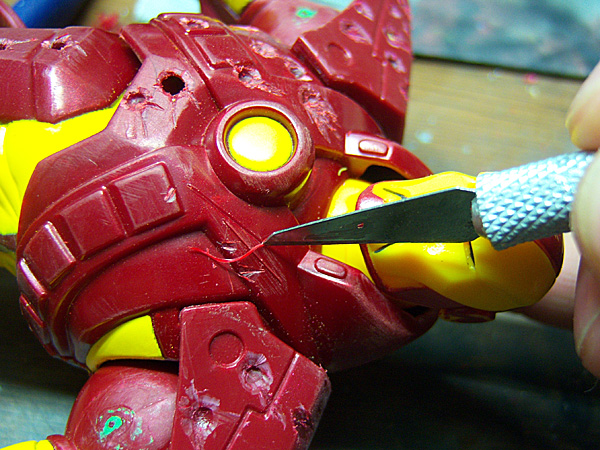
I also want to break up the edges a bit with some tear marks or chipping such as what I did here with my exacto:
I opted to turn these three marks into longer cuts, maybe from Wolverine's claws?:
You'll notice I didn't do a 45 degree V cut here but kept the angle closer on these:
However, for the chest piece I am doing some straight on claw marks so I cut in at 45 degrees on one side...:
...And then the other side to create a V shaped groove that will fill in nicely later with the oil wash:
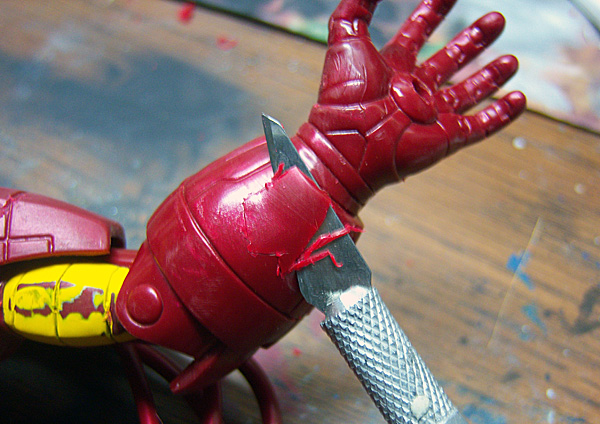
Studying the thickness of his gauntlets I decide I can cut in pretty deep so I opt to remove a squarish piece from Tony's left arm as a system in his armor exploded and blew off its protective panel. First I slice out the shape with my exacto:
Then I carefully route out the inside trying not to cut too deep:
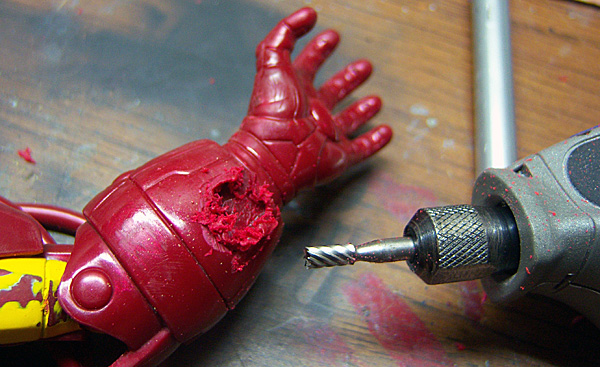
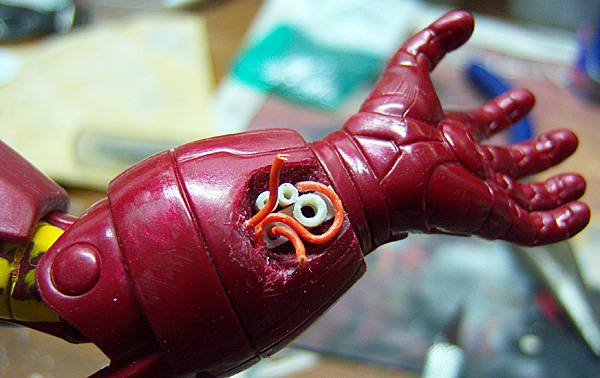
Now I have some room to add some scratchbuilt interior components and wiring:
Now I go over Stark with some different grits of sandpaper to remove remaining flash and prepare the surface for painting:
The first stage of painting invovles priming with flat black Krylon spray paint:
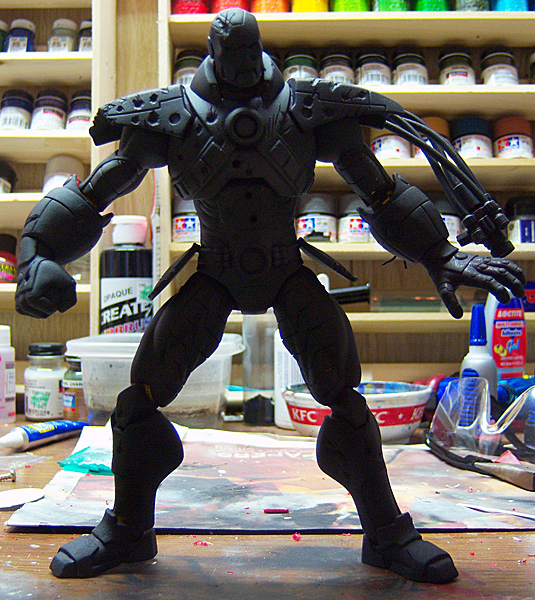
I use this stage to hunt down defects and any flash I missed. I then switch to Testors Model Master Acryl flat black in the airbrush to hit the areas that the spray can can't get to:
The black basecoat is allowed to cure and then sprayed down with Future floor polish:

Next application is Krylon Brilliant Silver metallic spray paint. You will notice I removed the head and masked the joint to prevent it from getting painted. The reason is that this joint is already very tight and paint will only make it harder to move. And unlike the black, I do want the silver to get into the recesses better:
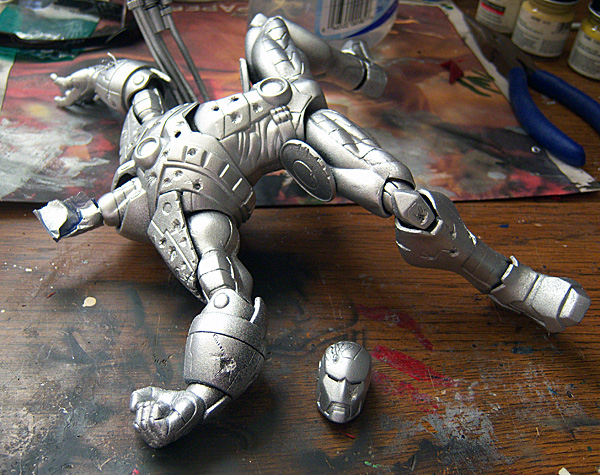
After the 2-3 coats of silver have cured, I add atleast 3 coats of Future and let them cure. The neck masking is then removed:
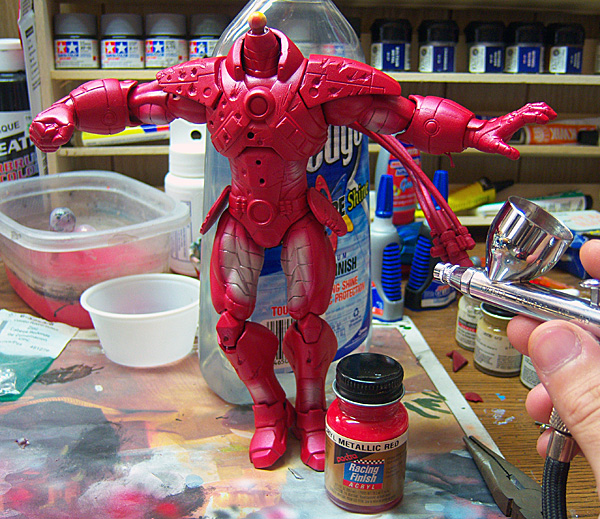
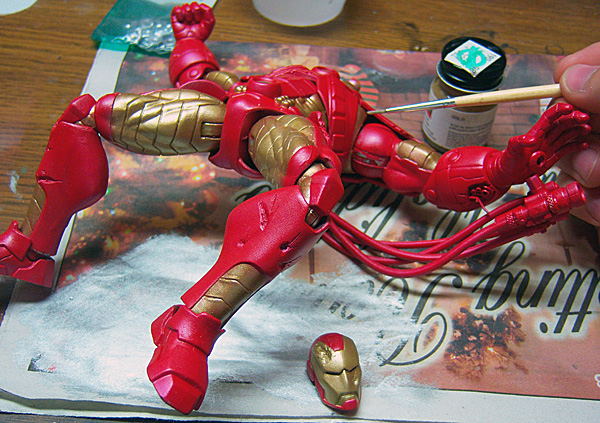
Now I select my red and gold tones and decide which one should go on first. On the body it's the red that has the most coverage so I load up on Pactra Racing Metallic Red in the airbrush and do just one main coat, leaving large areas that will be gold mostly untouched:
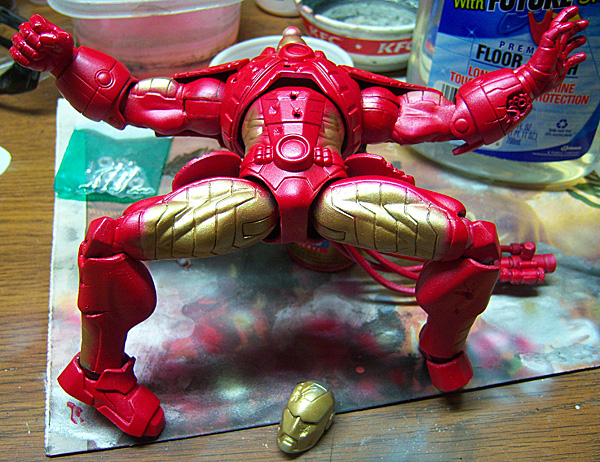
Now I go back and carefully airbrush on Testors Model Master Acryl gold in the larger areas, being careful not to overspray into the red. Since Tony's helmet is mainly gold, as opposed to the body, it gets gold first:
Tthen is masked offt:
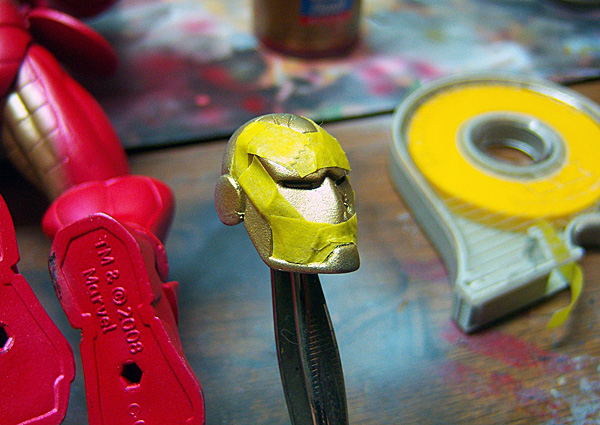
And the red applied:
I remove the masking right after painting, pulling slowly and away from the edge. The lines between red and gold are nice a crisp except for one little corner above his right "ear":
But that's ok because now it's time to go back with a brush and define the gold areas with a clean line as well as paint in spots I couldn't hit with the airbrush:
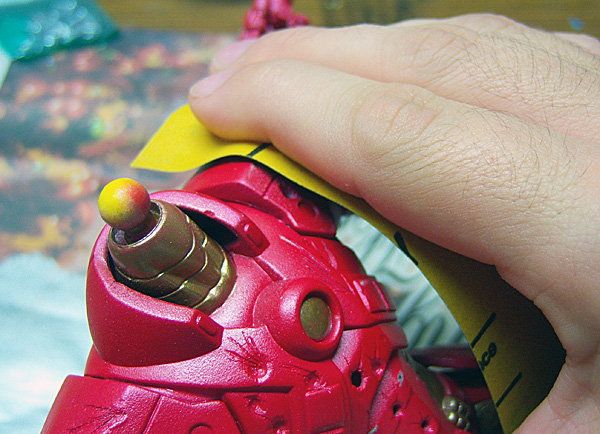
Now it's time to scuff that new paint job back down to the metallic silver beneath. I select a new, clean sheet of 1000 grit sandpaper to start with:
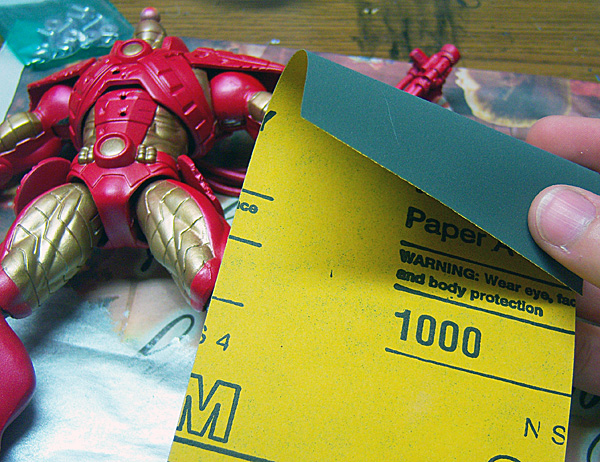
Using very slight pressure I take the sandpaper over the edges with just 1 or 2 back-and-forth swipes, checking every time to make sure I'm not chewing right through the silver and into the black. Even using a fine grit will take off the paint very quickly, especially at the edges:
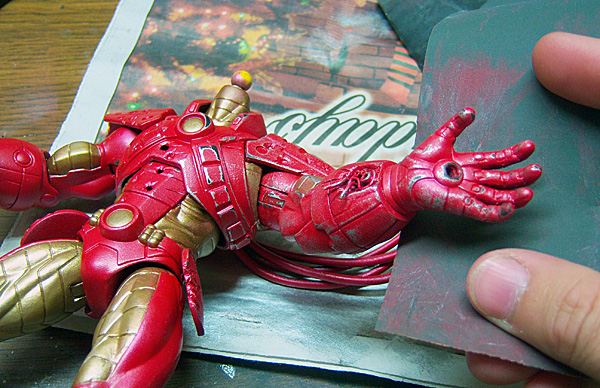
For contoured areas like the hand, I spread my thumb and forefinger out and grip the paper from behind, guiding around the edges of the contour:
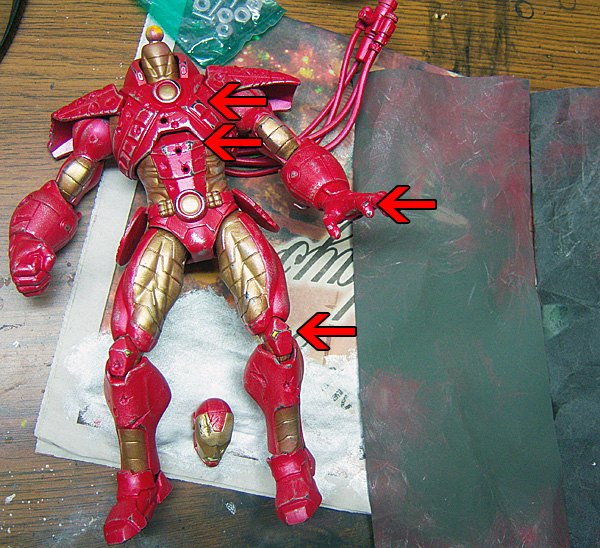
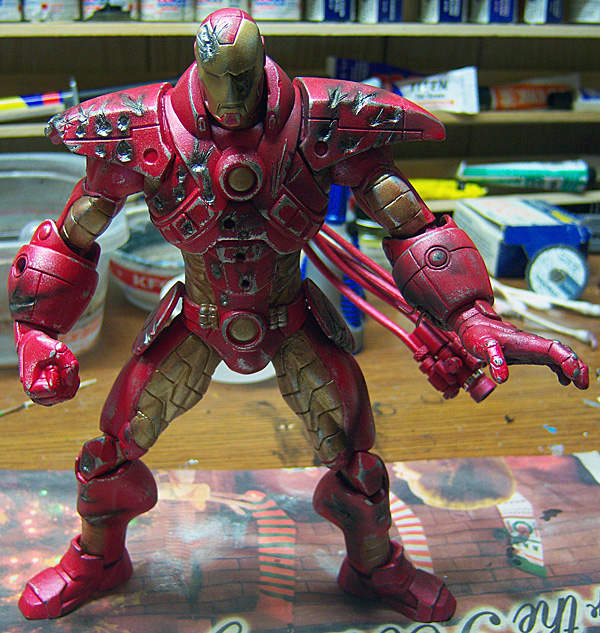
After finishing my sanding of the body I take a step back and see if there are areas that are likely to see more wear that need more attention. I have highlighted in the picture below where the sandpaper went through the silver to the black, and in the case of the knee, all the way back down to the bare plastic:
These areas need to be touched up so I pull out some Games Workshop Citadel mithril silver which blends perfectly with my silver undercoat. I use it to touch up edges and fill in areas that can't be sanded such as the bullet hits themselves:
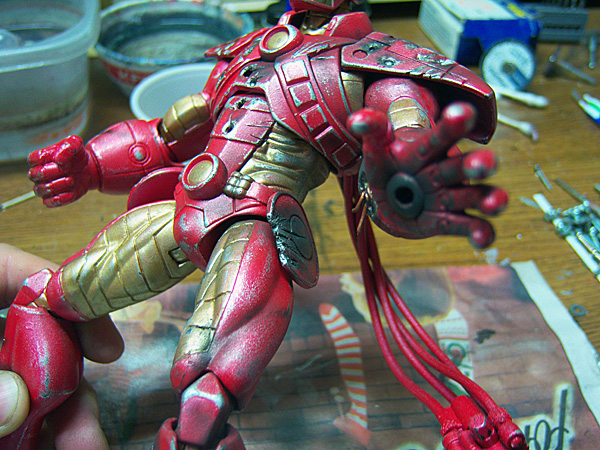
I also can use this silver to add some to the sanded areas making the silver on the edge thicker or more broken up if I need to. I also take this step to go in and paint the exposed components of Tony's left arm with some different metallics:
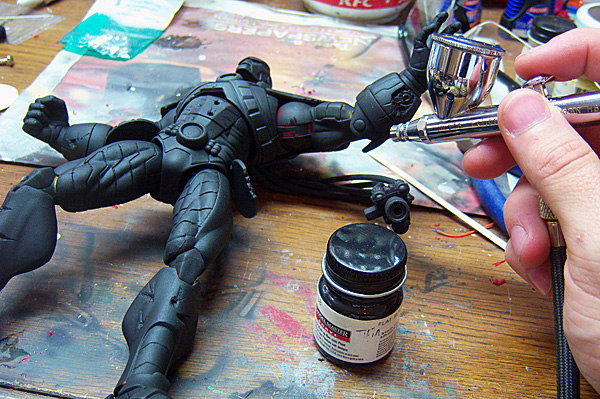
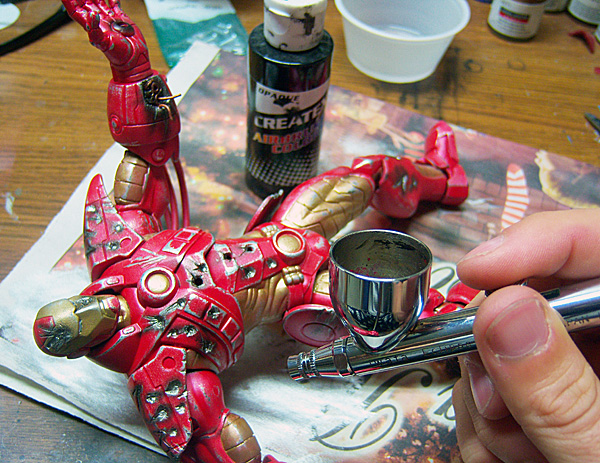
Now it's time to add some scorching to those blast marks with some Createx black in the airbrush. I spray as lightly as possible, building up areas with the black instead of just spraying strong outright:
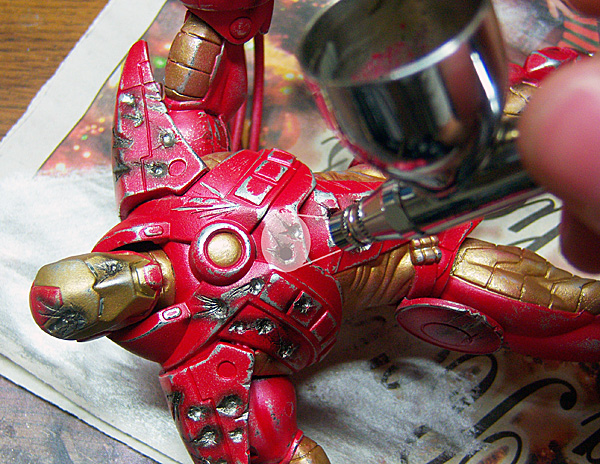
For hits that are more straight-on I spray almost directly at them as in the enhanced photo below:
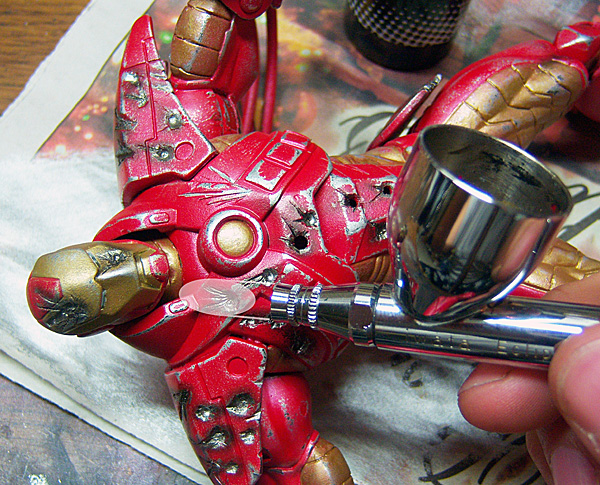
And hits that are at a more extreme angle I spray at a longer angle creating long streaks:
The exploded panel area gets "burned" out with black and Stark's open left hand where his repulsor blast emitter is also gets some scorching:
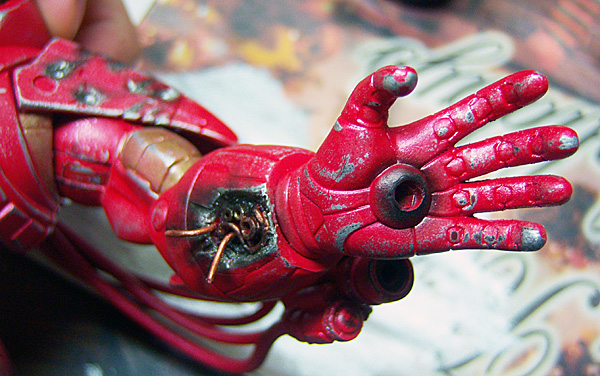
Next up is to take some ground up pastel chalk and brush it on lightly with a soft hair makeup brush to add soot, dirt, scuffing, and to soften and blend the scorch marks themselves. I neglected to take a photo of myself doing this but you can see the process started on Tony's left forearm in the photo below:
This gives Tony a better look like he has been thrown in the dirt a few times. The firing scorch on his palm is also blended better with the chalk:
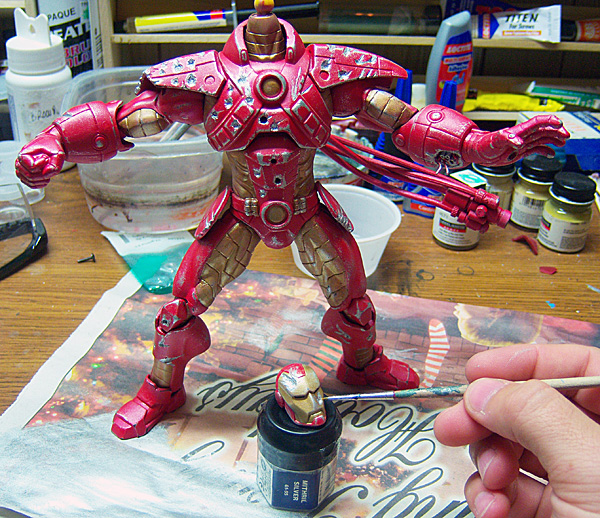
Now it's time to seal in this layer with some Future floor polish. We will need a smooth, gloss coat in order to do the next step which is an oil wash:
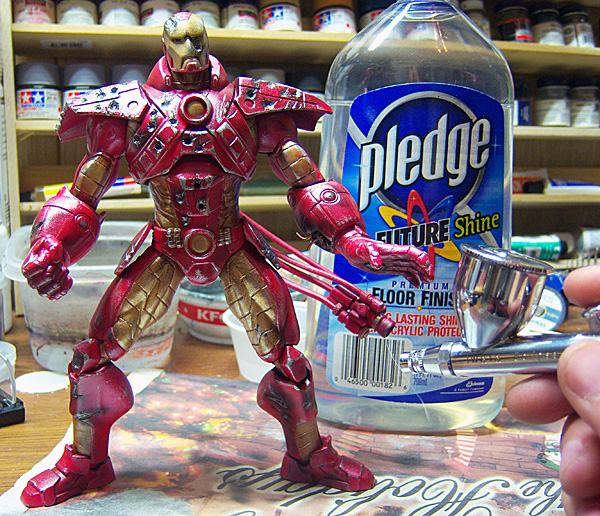
I take Georgian Oil paints that you can get at Wal-Mart, thin them down with some Thinner, and "wash" this mixture into the recesses and panel lines of the figure. Finding the right ratio of paint-to-thinner is hard to say, as each type and brand of paint and thinner is different. But if you start to apply the wash in a panel line, and it seperates into chunks, then you have too much thinner and need to add more paint:
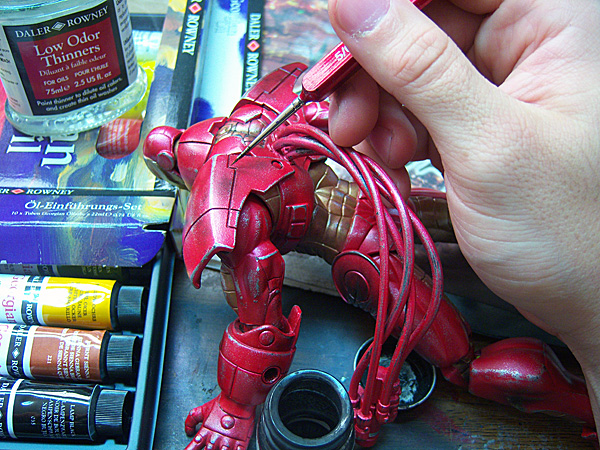
Using a very fine tipped brush, I just dip the end into the wash and let the hairs pull up some of the thinned paint. Then I take the brush to the panel line and just touch the tip and the paint should flow easily into the recess:
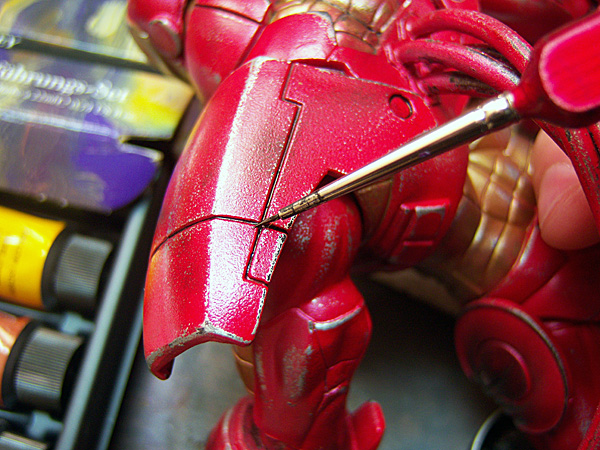
Once Tony is completely washed, now he needs to be cleaned. Kind of an oxymoron, right? Well your oil wash is bound to creep out or spill in areas you don't want it, so I take a Q-Tip and just barely wet it with some thinner, then draw it across the areas with excess wash and it will clean it right up:

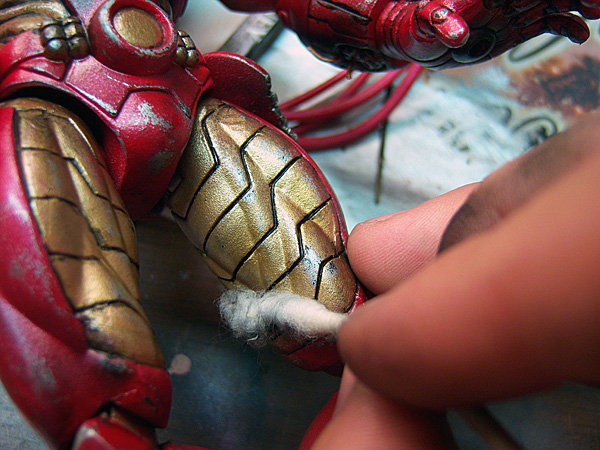
Be careful not to pull the Q-Tip in the same direction as the panel lines, as it may draw up some of the wash with it. Instead, try to run the Q-Tip in a direction perpendicular to the direction the recessed areas are going. Such as below, I am pulling the Q-Tip downward to clean up the panel lines on the legs:
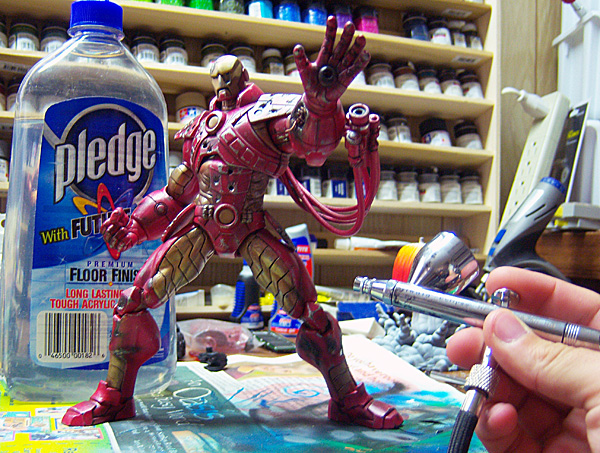
Ah, now he's been shot, drilled, exploded, scuffed, dragged in the dirt, chalked, and washed, so Iron Man needs a final clearcoat of Future to seal it all in and he's finished! Gimme a high-five, Tony:
 |
|